Tuesday, December 22, 2009

Back! ... and brb!


Hi all, or at least those who still read my blog. *ashamed*

It has been around two months since my last post. I know I mentioned on the " I was in... " post that I'll be away for a couple of months in order to work on my graduation project or thesis, but I thought I might be able to come back earlier but that took all my time =( .

However, I have good news! =D I'm DONE with that project *woot*. Oh my god! the day I turned it in, I felt like... like... that that was the biggest achievement I did in my whole life! lol XD. I had so many sleepless nights working alone on it since I wasn't working with a group, and that's what added to my achievement feeling that I did everything on my own. Well, I can't be that ungrateful and say everything =\, my professor helped me a great deal, so... thank you professor. =)

Bad news =\! hmmm where do I start?! lol. Well, the charger of my laptop where I keep all my photos in has burnt so I can't charge and start up my laptop unless I order one which is bad because all my photos that I took recently are hostages now in that laptop =\. Second, I did turn it my graduation project, but I still have almost two weeks to finish my last course.

So, Good news again! lol XD. January 7th will be my official last day in University, then I'll graduate *woot woot*.

Anyway, I shall be back soon, and because I missed photography for a while now I created a DeviantArt account to share my photos because Flickr is banned in my country =|. Once I get done with univeristy stuff I shall be back with more tutorials ;).

"yda" I feel like disappointing you because you asked me not to stop giving tips and tutorials here, however I did stop for a while... sorry... but as I said I'll be back. =)


Tuesday, October 20, 2009

Bokeh it up!


I'm back again with an easy and simple tutorial on how to add bokeh to your photography. =) I had to take a break from my studies anyway. ;P

So, bokeh is a Japanese word that means "blur". You can read more about it here.

Many photographers like to take bokeh pictures and make bokeh stocks that other photographers would like to add to their photos as well as amateurs would like to. ;)

Therefore, I'm teaching you how to apply them on your photos... it's really easy =D and I see that it adds glamour and sometimes cuteness to the photos.

First

- Download some bokeh stocks that you prefer.

I can help you with that ;) here are some links for some bokeh stocks I liked from devianart

[1]  / [2]  / [3]  / [4]  / [5]


Second

- Open the photo that you would like to add the bokeh to...
I'll use this one for example


Third

- Open the bokeh picture that you would like to add and place it on your photo

I used this one from deviantart member "regularjane"


[Optional] to have a control over where you want the spots to be on your photo try to resize, tilt, flip, rotate the bokeh picture till you think it's perfect (go to  Edit > Transform > "and you'll have many options that will help you position the picture correctly")


Fourth

- Change the blending mode to "Screen"


and the photo will come out like this


Fifth

- Change the Opacity
because sometimes the bokeh has a very strong effect on the photo therefore you can decrease it alittle bit.


THAT'S IT =D !


Try adding bokeh to your photographs I'm sure you'll like it =)
and if you did, please link me up so I would see your work =D

Have Fun!

Wednesday, October 14, 2009

Cupcake Night


It was after mid-night when I took these pictures. I couldn't sleep so I went to the kitchen to eat something (a good way to gain weight =P) and found 2 plain cupcakes. I ate one and when I was about to eat the second one I thought to myself why not take pictures of it.. it looks cute and I have nothing to do anyway. =)

These are only 6 pictures tho I took more than that but it's ok it happens all the time, you take lots of pictures of something but you only like 1 or 2. It doesn't only happen to amateurs but to pro photographers too.
you just remember to say "eyePhotograph". =)


Sunday, October 4, 2009

A new born flickr account!


Because sometimes I just feel like I want to share my pictures without having to write anything or give a tutorial, I decided to create a flickr account to showcase my photography. =)

It doesn't mean that I'll leave blogger =P I'll keep sharing tips and tutorials here of course.

Pay a visit whenever u feel .. hmmmm .. like you have nothing else to do! =P

Wednesday, September 30, 2009

I was in...


...again.


I'm sorry for not posting for a while. I was in Dubai to take a breather before I get really busy with my graduation research that will take most of my time. Yup! I'll graduate this semester... hopefully =P. I'll hold a bachelor degree of business sciences with both concentrations Accounting and Marketing =). However, I'll make sure to check on the blog every now and then and read your comments of course. ;). So, I'm sorry to say that I won't be posting much in the near future, or at least these couple of months tho I have many ideas and tutorials I'd like to share with you, but the time will come sooner or later. ;)

So... I didn't get to take lots of pictures there but I managed to take few random pictures. I Hope you like them. =)


Friday, September 11, 2009

Rule of Thirds


… is a composition principle used to achieve well balanced and interesting photos.

Now that you are trying to improve your photography and stop being a regular person who points and shoots and make their subjects always in the centre, then it’s time to learn this principle. =)

I know there are many websites that explain this rule more in depth; however I’m just trying here to get you started and take your hand and guide you to improve your photography by simplifying explanations of photography principles, or in other words how I simplified them to myself when I first started photography, because I know many amateurs would like to improve but don’t know where to start. =)


So, rule of thirds is simply breaking the image down into thirds (vertically and horizontally) or 9 parts.


Placing your subjects in the intersections of the lines or along them will make your image look more balanced and would communicate with your audience more naturally.

In addition, you can place your subject or your point of interest along any third as well to make your image look interesting.


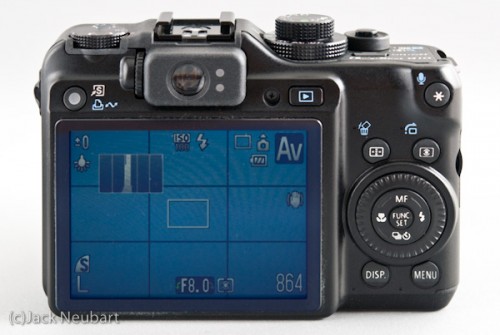
As you’re taking pictures try and imagine these lines to know where to place your subject to achieve a perfect composition. If you can’t imagine then it’s OK =) DSLR cameras have a function which enables you to view the grid on your LCD screen to ease this task for you ;).


(Google images)


(Google images)
I’m not asking you here to stop placing your subject in the centre of the image or the image would look awkward if you did so. However, you have to get the right angle to make centre images look interesting. =)

Practice this rule EVERYTIME you hold your camera to take pictures.
And remember to say “eyePhotograph” (^^,)